Care tips for Axie husbandry
Things to consider before purchasing your first Axolotl;
* Who will look after your new pet if you are away?
* Can you obtain its food easily from your local pet shop?
* Would you be comfortable feeding live larvae, worms, and crustaceans as food?
* Are you comfortable having live food in the house to feed your pet?
* Is the rest of your family happy to live with an amphibian?
* Do you house other pets who may be a danger to the Axolotls?
* Do you have space you are willing to dedicate to a medium to large tank and Axie care setup?
* Do you have time to properly care for the Axie?
* Do you have an exotic aquarist vet nearby, or are you able/willing to obtain the necessary medications to treat a sick axolotl?
Axolotls are great first amphibians for beginners, in the sense that they are relatively easy to care for once you get a routine set into place. They are also quite a hardy and forgiving species, so it is unlikely that your pet will become ill when following proper care guidelines.
To begin with; cycling your tank. This is an essential part of your care routine for any aquatic pet.
What Does it Mean to Cycle a Tank, and how do you do it?
First- De-chlorinated or bottled spring water should always be used as Axolotl are quite sensitive to various chemicals and cannot handle water with chlorine and chloramines in. Well water may be ok as long as it is filtered to remove heavy metals.
The purpose of cycling an aquarium is to set up a colony of beneficial bacteria that process waste from our aquatic animals into safer forms. This is known as the Nitrogen cycle, and is the natural way that waste from animals and decaying plants is converted back into nutrients that are able to be consumed by other organisms.
All waste breaks down into ammonia. The ammonia is then absorbed by beneficial bacteria and converted into nitrite. The nitrite can then be absorbed by a different family of bacteria that convert it into nitrate. Unlike ammonia and nitrite, nitrate is much safer in small amounts and poses no risk to animals, so long as it is kept within the safe range. In natural ecosystems, nitrate is removed from the water by plants that use it as a nutrient.
In aquariums, we need to do weekly water changes to remove the nitrate, even if we have planted aquariums, because the plants in the aquarium cannot process the entire bio-lode of multiple animals.
When you cycle your aquariums, you first add ammonia to feed the first group of bacteria. Once those bacteria begin to grow in number, they are able to add enough converted nitrite into the water for the second group of bacteria to become established. Soon both of these groups of bacteria are firmly established and are able to continuously keep ammonia and nitrite levels very low. This is when the aquarium is cycled.
Once you have a source of ammonia and a liquid test kit, you are ready to start cycling your tank. After you have filled your aquarium with water, then you can add the ammonia. It is okay to begin with less than you think you will need and add more if needed. A few hours after you add the ammonia, use your test kit to check your ammonia level. Your ammonia needs to be between 2 ppm and 4 ppm the entire time you are cycling your aquarium. If your ammonia is ever below 2 ppm, add more immediately. If your ammonia is above 4 ppm, do a small water change to bring your ammonia within afore mentioned range. Check your ammonia levels daily to ensure that it remains in this range. Eventually, you will begin to see nitrite levels rising with your test kit. They will increase at first and eventually start to decrease down to 0 ppm. Once your tank can convert 2 ppm of ammonia into 0 ppm ammonia and 0 ppm nitrite within a span of 24 hours, your tank is cycled! Before introducing your pets into the tank, check ALL of your parameters again. Make sure that ammonia and nitrite are still 0 ppm and make sure that your nitrate is below 20 ppm. If your nitrate is above 20 ppm, you need to do a small water change to lower it. Do not do water changes greater than 25% right away! Once ammonia, nitrite, and nitrate are at the proper levels, you must also check the PH levels to make sure it isn't too acidic or alkaline.
឵឵Tank water should be kept at a PH level of around 7. PH should be checked after each major water change to ensure that a similar PH is always maintained. If your water is soft you may use Holtfreter's Solution to add minerals necessary for overall health of your Axies.
I use John's Solution as it is easy to make at home. This is the recipe I use per litre;
Table salt- 3.24 g
Epsom Salt - 0.2 g
Baking soda - 0.2 g
If the PH and hardness is fine you are now able to add your new aquatic pet to its home.
឵឵-Just a note-
I always keep a used aquarium filter pad or sponge on hand, just in case a cycle crashes or to use when I am establishing a new aquarium. How does this help? When you place a used filter from a well established aquarium into a new aquarium, the bacterial media present in that filter will give a jump-start to the cycling process. With this method and the proper techniques you can sometimes successfully cycle a tank within 10 days.
You can also purchase bottled aquarium bacterial media from the internet, but these tend to be unreliable. Some work ok-especially if you have no other option, but others don't seem to help at all. NONE of them will fully cycle an aquarium instantly or within 24hrs, as they advertise. You will still have to test and wait until the levels reach what I described above.
When starting from scratch, or just learning this process, it may take a month or more to completely cycle a tank. With purchased or otherwise acquired media it can cut that time in half or better.
Many people give up due to the stress and annoyance of crashing cycles, but it doesn't have to be that way. If you purchased an axolotl without knowing about the cycling process, place your 'Lotl in a large glass pan, plastic tote, or even a half-full 10 gallon tank as a temporary home while you cycle his or her permanent housing unit. The temporary tank water must be changed daily. At least a 75% change per 5 gallons or more for a single adult 'Lotl is necessary to ensure they won't fall ill or get skin rashes. Anything smaller than 5 gallons must be 100% changed daily. Anything temporary with more than one 'Lotl housed in it must be 100% changed daily.
Eggs in a clean container do not need to have water changes done unless a film develops on the surface of the water.
Larvae must be kept in long, shallow containers and must have 100% water changes at least once a day, depending on what type of food they are receiving and how much it fouls the water.
How do you know if your aquarium is cycled, or if a cycle crashes?
I will always suggest the API Aquarium testing kit. This kit is a liquid based testing kit with simple directions and a clearly labelled range chart included. Simply follow the directions and check your aquarium's color measurements with the corresponding colors on the chart to see what your levels are. Continue to do this daily until the colors match appropriate levels for a cycled aquarium.
Do you have to cycle your aquarium to keep an axolotl?
The short answer is no. The long answer is yes.
No, you do not have to have a fully set-up, decorated, cycled aquarium to own an axolotl. However, this would mean that you intend to perform very large water changes daily to keep your animal healthy. This would also mean that you are most likely going to keep your 'Lotl in a shallow container with very little decorations, since you will be removing so much water every day. It can be done, but it is vastly more effort than simply cycling the tank. The water consumption required for this method would be huge, not to mention the time you would be wasting to do so. Short term, this is ok. Long term, you are setting yourself up for failure. These pets aren't complicated until we make them so by our choices regarding their care.
Axolotl physical properties and general facts of care.
Axolotls have virtually no true bone in their bodies, particularly when young. Much of their skeleton is made up of cartilage. Axolotls are delicate, soft-bodied amphibians with permeable skin and should not be routinely handled unless absolutely necessary (they are tricky to catch in a net). If you use a net to move an axolotl, avoid nets with metal or hard plastic mesh that would let an axolotl’s fingers get damaged. Use a soft, very fine-mesh net. You CAN pet your Axie, with cleaned and well rinsed hands. Your skin oils and salts could irritate the Axie's skin and any lingering detergent/cleanser could do the same or worse.
If you elect to hold your Axie, it is advisable that you keep your hand partially submerged in the tank to prevent accidents and keep the Axie from becoming too stressed. DO NOT HOLD a sick, pregnant, or birthing Axolotl unless it's an emergency as this could lead to further complications and death!
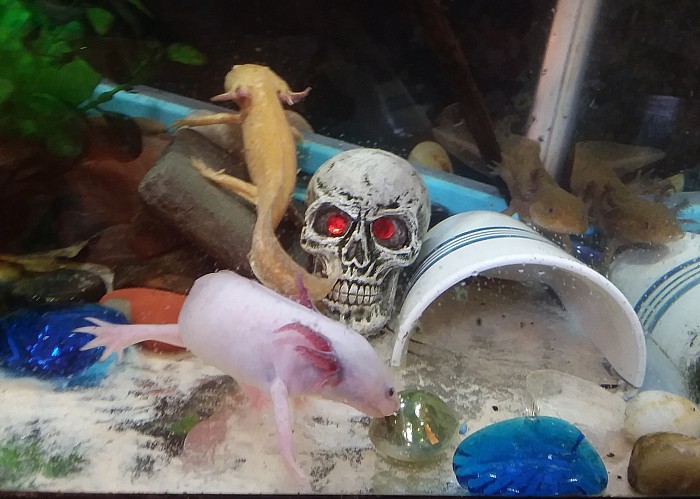
Axolotls have high predatory tendancies and will generally eat smaller tank mates, and sometimes the limbs of other Axolotls even if similar sized. If you plan on having multiple Axies it is advisable that you keep your Axolotls singly or in a very long tank with many hides to avoid this, even if the limbs will grow back eventually. This is generally only of major concern in young or "juvenile" 'Lotls. As they mature their senses develop and they can distinguish between prey, hands, tweezers and other Axolotls. This does not mean that accidents in adults won't happen, it just means that it is less likely in mature adults. If you notice one Axie always being aggressive, first make sure that you are feeding it enough and that it is actually consuming the food. If aggression remains, seperate it immediately, as constant limb regrowing is stressfull to Axies.
You do NOT have to keep multiple axolotls together for them to live long, happy lives. There are many conflicting arguments regarding this topic, but from personal experience as well as discussions with veteran axolotl keepers, some 'Lotls seem happier with tank mates of the same gender and some prefer to be alone. Get to know your axolotls and their preferences and then follow your instincts. I have 4 adult females who are incredibly happy living together and none of them like to be alone. On the other hand, one of my males is highly aggressive toward other males, and must be kept alone when he is not breeding because he tears limbs off the other males. He does not harm females though, and he loves to breed, so he really is an odd character.
When raised properly and not allowed to cannibalize their siblings as hatchlings and juveniles, several axolotls of similar age and size can generally be housed together without any complications. In order for this to work, multiple hides and plants are suggested, as well as more often tank cleanings and a strong filter with a flow reducer.
Some people may say that it is ok to keep Axolotls with aquarium fish, but this is not advised. Not only is there a high probability that the Axolotl will eat the fish, but the fish may also try to eat your Axolotls gills and digits, causing damage and stress to your Axolotl. Small fish, such as guppies, will be readily consumed, but an Axolotl will generally snap at anything moving in front of it's face, so it may snap at a fish that is too large to swallow and choke to death. Fish may also pass disease or parasites to your axolotls and their waste will cause the need for further filtration and cleanings.
If you raise guppies or other live bearers, then you will know that they aren't carrying parasites or illness and you will be able to determine the appropriate size to place in the tank with your 'Lotls to be consumed.
Housing
A 10-gallon (38 liter) tank can work for a single axolotl. However, bigger is generally better when it comes to an axolotl. Opt for the biggest tank you can reasonably fit into your home. A 20-gallon long (76 litre) tank is a great size for one or two axolotls. Always remember that floor space is key when keeping 'Lotls, so purchase tanks that are longer than they are deep.
If you get a plastic container, beware. If it smells strong it will likely leach chemicals into the water.
Remember, Axolotl are fully aquatic, so there is no need for land mass in the aquarium. Axolotls are not adapted to live on land, and will dehydrate and die quickly if they escape and are not returned to the water in time. If you use a long, shallow tank, it is advisable that you use a grate type lid, securely fastened, to keep Axies from escaping while allowing maximum air flow.
If you are using a tall tank, a lid is not necessary as long as you don't fill the water too high.
Temperature
Axolotls are a cool water species. They prefer water temperatures to be between 62*-68*F. The temperature in your aquarium's must remain fairly constant. Continuously fluctuating temps will stress your pet and cause them to get sick- usually with fungus.
If you live in a warm, southern climate purchase as aquarium chiller and set it to the desired temperature to maintain a happy tank.
In colder, northern climates you probably won't need a tank chiller since your house will be at a steady temperature run by your home heater most of the year. Although, if you keep your thermostat set above 68* during cold months or if you dont have air conditioning during summer months then you need to consider purchasing a chiller for your tank.
Filtration
The benefits of a filter include; higher oxygenation, less frequent water changes, lower overall ammonia and nitrates, and beneficial bacteria buildup. The downfalls include; water agitation(stresses axies), further purchases to place waterflow reducers, splatter effect on walls unless you add a splash cover.
You can choose to use a hanging water filter system for your tank, but if you do, be sure to use a low flow whisper filter to reduce water agitation and add a flow reducer or tall plants at the end of the filter/thick floating plants.
Another acceptable option is a sinking sponge filter, which employs air current via a tube into an airstone type filter. The air flow pulls water into the filter while releasing air bubbles into the tank. Too much airflow can stress the axolotls and too little won't sufficiently filter the water. It is best, in my experience, to surround this type of filter with fake plants and hides to reduce the exiting flow.
Decorations
You can choose to provide substrate or leave the bottom bare. Substrate is material that lines the bottom of an aquarium. The bottom of an axolotl tank should ideally be lined with large, smooth slate stones or fine sand (reptile sand can be used in a pinch but if it contains calcium it could cause Ph softness which would require the use of Holtfreter's solution). Do not use small pebbles or rough sand (such as blasting sand). An axolotl may accidentally ingest such substances, causing impaction- which could lead to a vet visit and/or death.
A bare bottom tank is the easiest to clean but could stress the Axies, as they would have nothing to grab onto while walking around the bottom of the tank.
You can also choose to use aquarium safe silicone to adhere tiles to the floor of your tank. This looks great and gives the Axies something to grip while walking, but be certain to fill all of the cracks 100% or else poop and decaying matter will get trapped there and cause ammonia spikes and eventually illness or death of your beloved caudate.
Be sure to add vegetation, either real or fake will work. Real plants add oxygen to the water, filter ammonia and provide great hiding places while being aesthetically pleasing but can carry parasites and fungus. Additionally, axolotls may snap at live plants and accidentally consume them. This is a problem because axolotls can not digest plant matter and it could lead to severe constipation or impaction. Fake plants don't need substrate, are easy to relocate and can be cleaned with the tank instead of being removed with the 'Lotls.
I also use driftwood in my tanks. I have chosen large pieces from the beach and brought them home for my 'Lotls to play on and under. I always make sure to rinse, boil, rinse, and dry all wood or stones before adding them to my aquariums to ensure that no parasites or other harmful things can enter my tanks.
Keep lighting minimal. You do not need to provide lighting for an axolotl the same way you would for a fish tank. Bright lighting may actually cause an axolotl to feel distressed, so opt for a plant light or plant very thick vegetation and add many caves for them to hide in. Axolotls do not need much light to thrive, so lighting is usually for you to see the animal rather than for the axolotl’s benefit.
Minimize how often you keep the light on. Lights can generate excess heat, which can be bad for an axolotl. Turn it off when you are not feeding or viewing the axolotl or keep it far enough away so as to minimize the heat effect. Axolotls thrive when on a light schedule. Keep a low led light on for eight hours a day to establish a routine. This will also help if you decide to try your hand at breeding, as changes in the amount of light and temperature changes instigate breeding bahavior in the wild.
I have found that my axolotls prefer white LED light over incandescent lighting. Also, keep in mind that black and blue lights may look great to humans viewing their tanks- especially if you own a GFP axolotl, but these lights are harmful to Axolotl retinas and over-use of these lights could cause permanent damage.
Axolotl Food
Good staple foods for axolotls are nightcrawlers(large earthworms), garden worms, and frozen bloodworm cubes.
Good treat foods for axolotls include, guppies, blackworms, fresh frozen shrimp(rinsed and peeled), raw, boneless fish chunks(NOT BREADED OR SPICED IN ANY WAY), and occasionally, lean pieces of beef and chicken. Axies prefer live food and treats to pellets in most cases, but I have found that Hikari sinking shrimp pellets are gobbled up by my less picky individuals. Repashy sells a grub pie food that most axolotls would bite a finger off to get at!(not literally)
Bait worms are generally not recommended as they may contain parasites or fungus, but I've used them without any harm befalling my axies.
Axie larvae will readily consume baby daphnia, rinsed baby brine shrimp, white worms, rinsed vinegar eels, and when big enough, guppy(or other livebearer) fry, California blackworm pieces, and scuds.
For more in-depth discussions, follow-up information, and infomation on breeders visit;
Lizard's Breath 'Lotls Facebook page
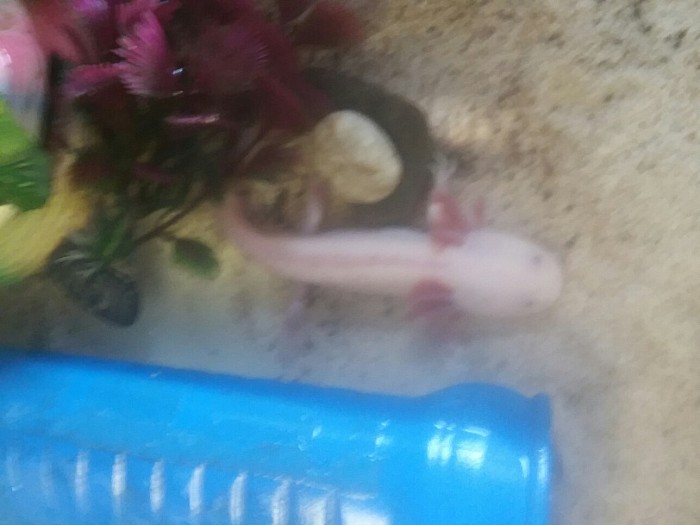
Lucian, an adult Leusistic male at 14 months old.
Axolotl Breeding
Now that we've been through the basics of Axolotl keeping, let's move on to something slightly more complicated.
Many sources concur that the breeding season for axolotls is from December to June. However, they can be bred at any time of the year, although most success is reported in the early part of the year.
One study suggests that males and females can be subjected to an artificially decreasing "daylight" period over a few weeks, after which the duration of lighting is steadily increased. This effectively tricks the Axies into believing that it's breeding season. You may then introduce a male
and a female and courtship behaviour usually ensues.
Another study instead recommends a sudden change in temperature to trigger courtship behaviour. Keeping the pair separately for a few weeks at 68-71 ° and then transferring them both into a tank with a water temperature around 54-57° frequently triggers courtship behaviour. Beware, however, the thermal shock may encourage breeding but it is also stressful to the Axies so if you opt to use this method make sure to spend extra attention on the breeding pair to ensure proper recovery. In order for this procedure to be successful, the female must be receptive and old enough to breed.
In my experience, by keeping axolotls in a room that receives at least partial seasonal change in lighting provided by a window, breeding will occur naturally, generally at least once before the peak of winter and once in the spring, if the axies are adequately fed and properly cared for. Around the end of May, males tend to begin depositing spermataphores in their tank(usually after water changes) which signals to me a readiness to breed.
A pair of axolotls kept in good conditions should breed at least once a year, albeit unpredictably. Axolotls may spawn for no obvious reason, at "odd" times of the year, which is why it is a good idea to keep genders separate. Females will become exhausted and be more susceptible to illness if bred too often, but it is impossible to restrict breedings when opposite genders are housed together.
The breeding setup most commonly used includes many plants and large, soft edged rocks or slats. Plastic plants work well because they don't rot, but I also use clumps of live Java Moss for texture, oxygenation, and for the purpose of filtration. Female axolotls affix their eggs to the plants and the rocks are for the male to deposit spermatophores on(Spermatophores are packets of sperm attatched to cones of jelly). Spermatophores will not readily stick to bare glass or plastic, but many hobbyists have been able to make it work. In order for mating to be successful the spermatophore must be stationary during courtship. It is recommended that you place the tank in a room where it will be left alone or cover the breeding tank with a cloth, so as not to disturb the pair, but mine breed well in my living room so this step isn't mandatory.
Spawning is initiated by the male, who swims around, raising his tail and "dancing" vigorously. He nudges the female's vent occasionally and then leads her around the tank, where he has placed spermataphores. The male deposits between 5 and 25 spermataphores around the tank and attempts to lead the female over them. She then picks up the sperm cap (from one or more spermatophores) in her cloaca, where fertilisation occurs. Occasionally the female may also nudge the male's cloaca which can lead to a prolonged "dance" around the tank. If you house more than one male in the tank you are using for breeding and multiple males deposit spermataphores it can lead to the female absorbing sperm from multiple males, even if you remove all but one male before breeding. This is one of the reasons to use separate tanks for housing and breeding. Other Axies or tank mates may also disturb the mating pair, causing stress and potentially preventing successful breeding.
Anywhere from 5-48 hours later the female commences spawning, laying each egg individually within it's own jelly sack. She will lay them on the leaves of plants, rocks, wood, etc if available, but if not, she will place them about the tank, attatching them to any object available. There may be between 100 and over a thousand eggs laid in one spawning, depending on the size, age and overall health of the female. After the female has finished laying, it's best to remove her and the male and place them into their respective tanks.
Axolotl egg and juvenile care
Normal wildtype and melanoid axie eggs are dark brown. An albino, leusistic, golden or other light colored female will lay white, pigmentless eggs but if the offspring contain wildtype or melanoid genes pigment will appear during embryo development, before the babies hatch. The eggs take between 2 and 3 weeks to hatch, but development seems to be optimal when the eggs are attached to plants and kept at a constant temperature.
Many Axolotl owners and breeders perform and recommend culling your eggs within the first few days to reduce the population of hatchlings.
This involves carefully removing the selected ones from the tank, without disturbing their neighbors, and then packaging them in a ziplock bag or bucket and freezing them.
The reason to do this early on is because it's more humane to freeze them before their nervous system develops so they won't feel any pain. Not all Axie keepers agree with culling, but you have to have a large outlet to be able to sell or give away 200-1,000 egges and/or larvae. Once frozen, you can dispose of them as you see fit.
The majority of (fertile) eggs should hatch if kept in well-aerated water. An air pump or air stone at one end of the tank will be helpful, just be sure it doesn't cause vigorous water flow. At 68 °F the eggs should hatch after approximately 17 days. The absolute MAXIMUM teperature to hatch eggs at is 77° but it's best to keep them under 73°. Warmer water can cause the eggs to mature sooner, while cooler water can delay hatching(to nearly 20 days).
Remember to use dechlorinated water. Water shouldn't be soft: do you get limescale in your water pipes or kettle? If you get limescale, your water isn't soft. Check out the John's solution I listed on the Axie care page for an easy way to harden the water to an acceptable degree.
Being able to manipulate the time taken to hatch can be very useful if the breeding wasn't planned. By lowering the temperature, and subsequently lengthening the hatching time, you will be able to prepare housing for the larvae and acquiring a food source such as brineshrimp, Daphnia culture, or microworms.
Within 24-72 hours after hatching, the larvae will require food. From this point until they reach approximately 20mm(just under an inch) in length, their diet must consist solely of live food items of a very small size. They will ignore dead food until they have grown significantly, because young larvae instinctively respond to prey movement alone. It is not until after their sense of smell develops that it will play a role in feeding. If you cannot meet this demand for tiny live food, your larvae will starve to death, unless they eat each other. It is very difficult for newly hatched larvae to eat one another but once they reach 18-22 cm this can become an issue. For newly hatched larvae, the live food choices are; newly hatched brineshrimp, small Daphnia, seed shrimp, rotifers, cyclops, vinegar eels, white worms, and microworms. Microworms are not ideally recommended as they won't generally be well received until the axolotl larvae develop their front legs. They also aren't the most nutritious food for larvae Axolotls fed solely on microworms have shown a tendancy to grow very slowly, and may be picked on by larger larvae. I am by no means saying that they WON'T work for larvae, but it may take some coaxing to get larvae to eat them and you may end up having to switch foods quickly. Microworms are a good emergency food for juveniles though.
In young light colored larvae you can actually see the liver, heart, stomach and intestines right through the skin.
To minimise cannibalism, it is highly recommended that the tank is heavily planted and that light levels are minimal. Another, more effective, method is to reduce the numbers as much as possible in each container and lower the lighting.
Many Caudate websites and articles recommend culling or euthanizing disabled larvae as soon as possible. If you choose to do so, one of the most humane methods is to place selected larvae in a separate container, adding a pint of water with several drops of clove oil in to put them to sleep. Afterward, many caretakers add ethyl alcohol or freeze them while they sleep.
Generally, front legs begin to develop once the larvae reach 20mm or around 9-11 days. The hind legs and lungs begin to develop between 18-24 days. This all depends on temperature, food quality and frequency, cleanliness of water and unseen genetic abnormalities.
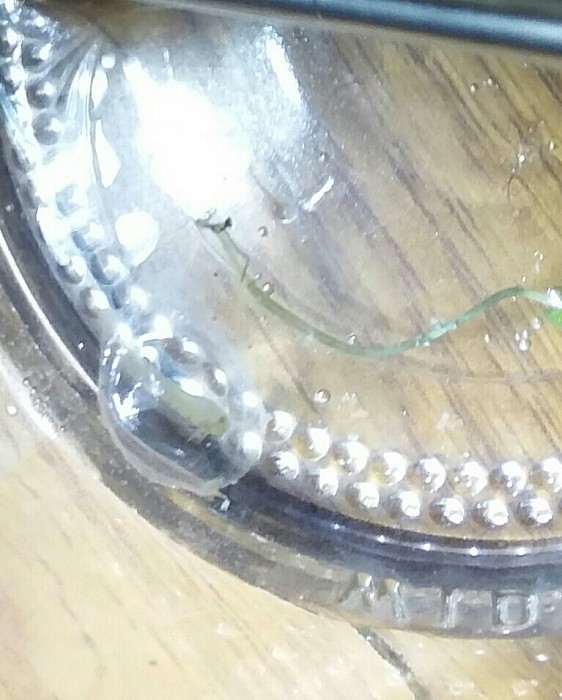
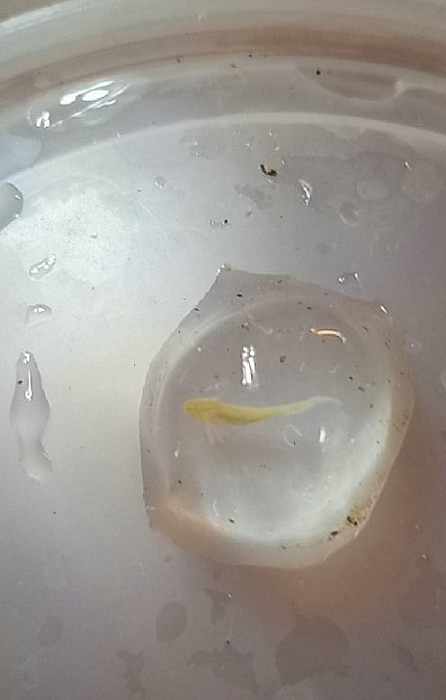
This is an individual Axie egg from Copper and Copper Melanoid.
Axolotl development images
Below are a few developmental milestones from egg to adult.
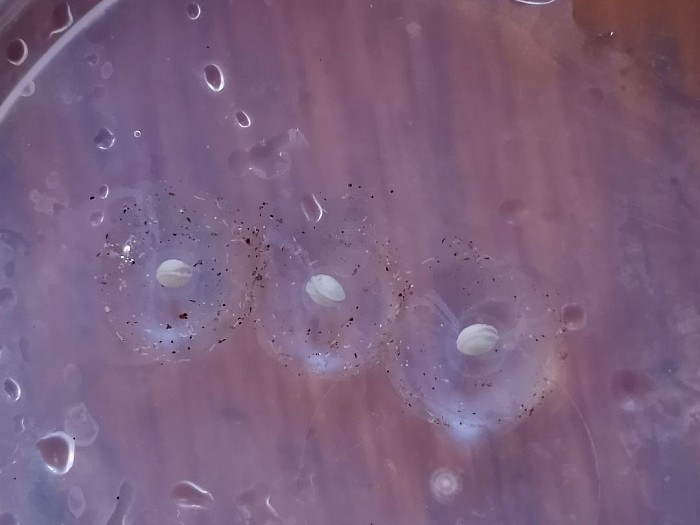
Albino egg blastulas

Eggs from albino female
Fully developed Albino larva inside its egg
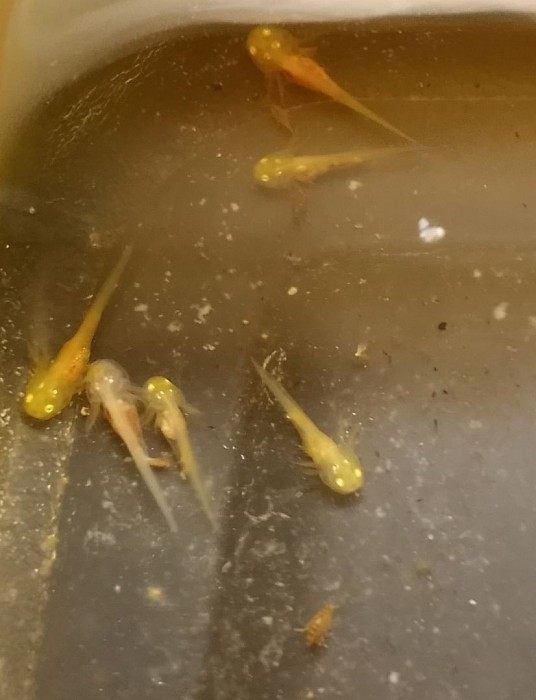
Albino axolotl larvae. You can notice the difference between the golden albino and the white, or leucistic albinos.
